I recall learning about @Walrus 🦭/acc for the first time. One late evening, I was browsing the Sui ecosystem for updates. A link to a website that ran solely on decentralized storage was circulated; it had no servers, no hosting company, and no single point of failure. I kept thinking about it. What if I could construct something similar? A straightforward personal page that genuinely belonged to me and couldn't be removed, perhaps a blog or portfolio.
I made the decision to give it a shot after a few weeks. Initially, I only wanted a few HTML pages, a few photos, and some simple styling. Not very fancy. However, the experience made me realize how effective this may be. Walrus distributes your files among numerous nodes and manages storage in a decentralized manner. Ownership is transparent and transferable since metadata is stored on the Sui blockchain. Additionally, anyone can access the website via open portals. not a primary host. No ongoing expenses. The world can access only your material.
That is what makes Walrus Sites so lovely. Although they appear to be standard websites, they are actually decentralized. Even if some nodes go offline, your files are always accessible because they are saved as blobs on Walrus and are protected by erasure coding. The website itself is linked to a Sui object, which you can change or even transfer, much like an NFT.
I recently tested this on the mainnet, and everything went smoothly. The site loaded quickly, uploads happened quickly, and gas expenditures were minimal. Allow me to take you step-by-step through my process. I'll discuss what I found to be effective as well as some advice I learned along the way.
Step 1: Prepare Your Tools and Wallet
First, you need a Sui wallet with some SUI for gas fees. I use the official Sui Wallet browser extension. Fund it with a small amount—honestly, less than you'd spend on coffee. The whole process uses very little gas.
Next, install the site-builder tool. This is the main way to publish Walrus Sites. It's a simple binary you download.
Go to the official docs for the latest links, but here's what I did on my Mac:
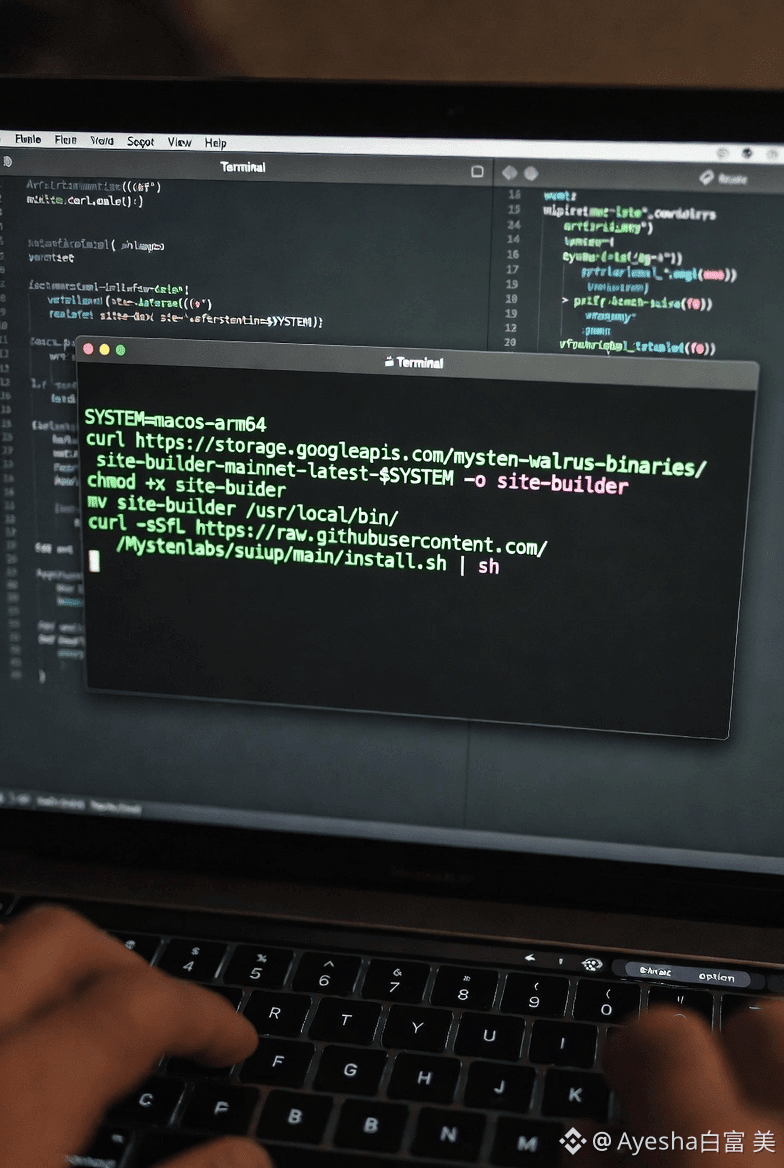
I set my system type and downloaded the mainnet version:
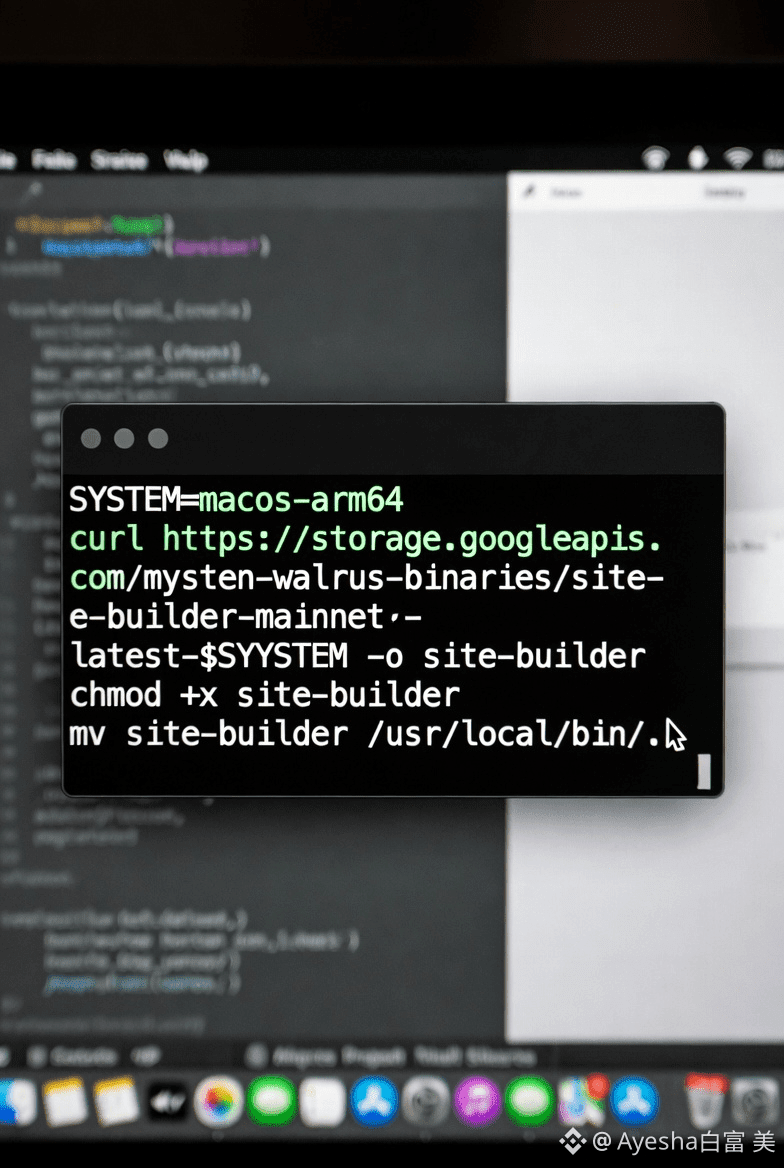
(Change the SYSTEM for your OS—ubuntu-x86_64 for Linux, etc.)
If you prefer an easier way, use the suiup tool:
Verify it works by typing:
site-builder.
You should see the help menu with commands like publish and update.One more thing: download the config file. This tells the tool where to find the Walrus Sites package on Sui.
Personal tip: I forgot the config file the first time and got an error. Once I added it, everything worked perfectly.
I started with a basic folder. Create a directory, say my-site, and add an index.html file:
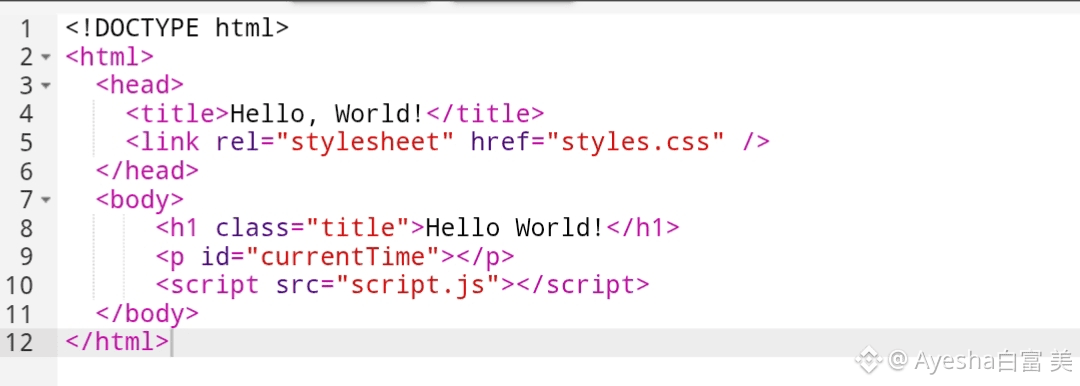
Add any images, CSS, or JS files in the same folder. If you use a framework like React, Vite, or Next.js (static export), build it first with npm run build. The output dist folder is what you'll upload.
Tip from my testing: Keep files reasonable in size. Walrus handles large blobs well, but for many small files, the tool groups them into "quilts" for efficiency. That's why updates re-upload the whole group—something to remember when planning changes.
Step 3: Publish Your Site
Now the exciting part. From your site folder, run:
site-builder publish . --epochs 10

(The dot means current directory. Change --epochs to how long you want the storage certified—each epoch is about 2 weeks on mainnet. Start small, like 5-10, and extend later.)
The tool will:
Bundle your files into quilts and upload to Walrus nodes.
Create a Sui object for your site metadata.
Print the object ID and access URLs.
In my test, it took just a couple of minutes. The output showed each file uploaded with a quilt patch ID, then gave me the site object ID.
Step 4: Access and Share Your Site
On mainnet, the easiest way is through the public portal at wal.app.The tool gives you a direct URL based on the object ID (converted to base36).
Just open it in any browser—no wallet needed.It worked instantly for me.
The page loaded, images showed, everything felt normal.
Step 5: Update Your Site Later
Want to change something? Edit your files, then run the same publish command again. The tool remembers your site ID from the first deploy (it saves to ws-resources.json).
Code: site-builder publish . --epochs 10
It will delete old quilts and upload new ones. Quick and simple.Tip: If you only change one small file, the whole quilt still re-uploads. I learned to group related files together. Future updates to the tool should make this even smarter.
Why This Feels Different
After my site was live, I sat back and thought about it. Traditional hosting always has that worry—what if the provider raises prices, or goes down, or decides to suspend you? With Walrus, the files are spread across decentralized nodes. As long as the network runs, your site stays up. And since it's on Sui, you truly own it.
I also love how open it is. Anyone can run their own portal to serve these sites. The public one at wal.app works great, but the design means no one controls access.
For me, this was more than just hosting a page. It felt like taking a small step toward a more open web. If you're curious, start small like I did. Build a simple page, publish it, and watch it come alive on Walrus.The tools are ready, the network is fast, and the feeling when it works is hard to beat. Give it a try—you might end up with a site that outlives every centralized host you've ever used.